Friday, July 29, 2011

Block 6 - Bow Ties


Well, we are going to say goodbye to half square triangles for awhile and move on to a new skill.  I don't know what the "real" name for this skill is, but I call it corner to corner sewing and I am presenting it as a bridge into making flying geese next month.  Plus, I love bow tie blocks.  They are a fun block that I think everyone should know how to make (as an added bonus, they are as easy to make as cold cereal).  :)

............


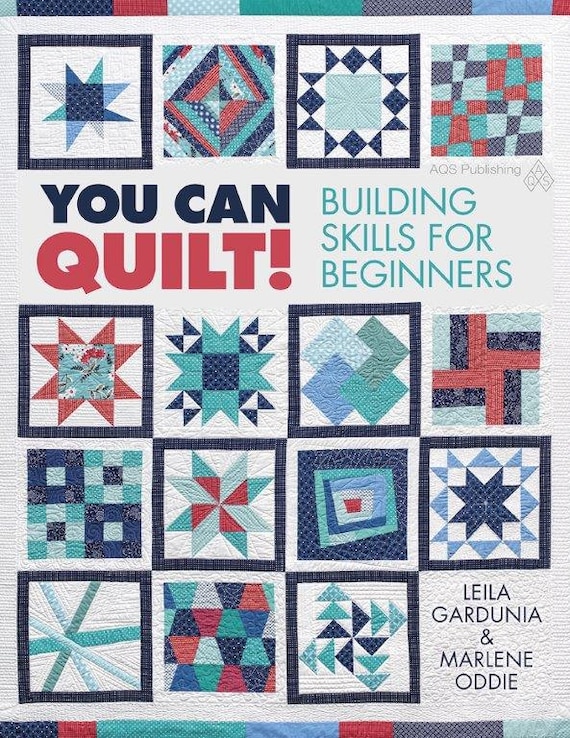
Edited (5/15):  The Skill Builder Sampler will is available for purchase in book form!  It has been renamed "You Can Quilt!  Building Skills for Beginners" but covers the same skills with the easy, medium and challenging blocks and is a million times better than the original quilt along.  It is perfect for the beginning quilter or the experienced quilter who wants to branch out and learn new skills.  Find more information and order a signed copy in my Etsy shop or order on Amazon.  
............

Cutting:

For this block you will need:

8 - white 3.5x3.5 inches squares
2 - 3.5x3.5 inch squares in 4 different colors (8 squares total)
2 - 2x2 inch squares in 4 different colors (8 squares total)


Draw a line from corner to corner on each of the 2 inch squares.

Sewing:


 Lay the 2 inch squares on one corner of each of the white/background squares.  Sew together ON the line - Not to the side.


Place the ruler 1/4 inch from the stitching line and trim away the excess corner fabric.  Press open.


 Lay out the white and colored blocks as shown.  Sew a white and colored piece together.  Pressed towards the colored fabric.

 Then sew the two halves together.  Take a second and measure your blocks.  They should measure 6.5 inches on each side.  If they are larger, trim down to size.  If they are smaller than 6.5 inches make your quarter inch seams a bit smaller on the next step.

Now take some time to play with your blocks.  You may want to lay them out like this...

or this...

or this...and sew together.


So many possibilities with just one block.  I can't wait to see what design and fabric you choose.  Be sure to check back in next week for some quilt math, a giveaway and a bonus block challenge!


Friday, July 22, 2011

Block 5 - Arizona, We Can Do It! Skill Builder Sampler


This is the last week of honing our half square triangle skills.  Hopefully by the end of this block you will feel comfortable with triangles.  Last week for my birthday, my mom sent me The Quilter's Album of Patchwork Patterns by Jinny Beyer.  I Love It!  This week I chose a block from the book to make.  The block pattern was first published by the Ladies Art Company in 1897 and was called Robbing Peter to Pay Paul.   The same block was later called Arizona by Nancy Page in the Birmingham News, July 7, 1936.  We will call it Arizona since there is another popular block named Robbing Peter to Pay Paul.  (scroll down for instructions)
............


Edited (5/15):  The Skill Builder Sampler will is available for purchase in book form!  It has been renamed "You Can Quilt!  Building Skills for Beginners" but covers the same skills with the easy, medium and challenging blocks and is a million times better than the original quilt along.  It is perfect for the beginning quilter or the experienced quilter who wants to branch out and learn new skills.  Find more information and order a signed copy in my Etsy shop or order on Amazon.  
............

Cutting:


1 -  4.5x4.5 inch square (perhaps a larger print)
4 - 3x3 inch squares (out of a medium fabric, similar in color to the 4.5 inch square)
6 - 3x3 inch squares (out of your darkest fabric)


Out of your background fabric:

4 - 2.5x4.5 inch rectangles
4 - 2.5x2.5 inch squares
10 - 3x3 inch squares


Sewing:

Draw a diagonal line down the middle of each of the ten 3x3 background squares.  Match each background block with a 3x3 inch print.  Sew 1/4 inch away from the line on each side.

After you sew down one side of the squares, feed the squares through the machine again with out cutting them apart to speed your sewing.

I recently found this great tip:  before cutting the squares apart, set the seam by ironing  the blocks.  It really helps keep the seams nice when you press them open.


Next:
  • Cut the squares in half on the line.
  • Press the triangles open.
  • Trim the half square triangles to 2.5 inches square.  (I have got to learn how to sew an exact triangle.  I thought the trimming would never end.  Should I be admitting that?)
Once you have all of your blocks trimmed, arrange the block components as shown in the picture above.  

A Brief Aside - A few months ago I was thinking that I needed a portable design wall to lay my block pieces on so they wouldn't get messed up as I sewed - I hate it when I sew the wrong pieces together!  I remembered this small flannel board that I used when I taught Sunday School.  I can prop it up right next to my sewing machine, sew pieces together, iron them, and then lay them back out.  It makes it a lot easier to keep them in order.  You could make your own flannel board by duct taping some flannel, batting or felt over a piece of cardboard or thin wood.  Mine is 15x15 inches.  

Moving on...  there is no set way to sew the pieces together, but the following pictures illustrate the order I sewed them together in order to optimize my ability to chain piece.


You have a beautiful block!

Enjoy this last Half Square Triangle block.  We will be moving on to a new skill next week, but will continue to use HSTs in other blocks throughout the year.

Remember to stop by the Flickr group to see the blocks everyone has been making and to post your own.

Remember...

Follow on Bloglovin

Friday, July 15, 2011

Block 4 - Pinwheels, We Can Do It! Sampler

For this weeks block we are going to practice making half square triangles and make a beautiful block in the process.  I love pinwheels!  They are such a cheery block.

In the beginning, I said I would link to other blogs if they had great tutorials we could use.  This is one of those weeks.  Vanessa, of V. and Co.,  has written a great pinwheel block tutorial that we will follow today.

............


Edited (5/15):  The Skill Builder Sampler will is available for purchase in book form!  It has been renamed "You Can Quilt!  Building Skills for Beginners" but covers the same skills with the easy, medium and challenging blocks and is a million times better than the original quilt along.  It is perfect for the beginning quilter or the experienced quilter who wants to branch out and learn new skills.  Find more information and order a signed copy in my Etsy shop or order on Amazon.  Because of the release of the book some posts have been removed.
............


I feel like a mom who is dropping her kids off at the sitter's for the first time, but I know you will be in good hands.  Vanessa is one of the funniest bloggers out there and we have a very-distant-and-unknown-to-her connection:  my sister-in-law's sister is one of Vanessa's super-small-town friends.  Plus Vanessa is moving next week and will only live 2 and a half hours away from me.  I know, BFFs, eh?  ;)

Ok, go take a look at her tutorial and then head back here to read my additional notes.

Cutting:
Cut the white squares as directed, but if you want 5 various colored pinwheels (like mine) cut two 3 inch squares from 5 different fabrics.

Sewing:
Quick Tip:  Chain stitch (just feed the next piece in without taking the first one out) down the diagonal of all 10! squares.  It will really speed the sewing up.  When you are done sewing all 10, don't clip them apart, just feed the chain of squares through the machine again, stitching on the other side of the line.

Sewing the HST Together:  When you lay your two HST together you should be able to feel the folds made by the seam lines butting up against each other.  Wiggle the pieces between your fingers until the seam lines are right up next to each other.


When you sew the two sets of HST together, make sure your seam line (the horizontal one in the picture) intersects the diagonal and vertical stitching lines.

I am sorry the picture is so blurry.  Can you still see it?

This will ensure that your points in the middle of the triangle aren't cut off.  (My points still weren't perfect, but it helps.)


After all four HST are together in a pinwheel, you can press open the middle seam as Vanessa directs, or take the middle seam between your fingers and pull it apart just a bit in the middle - just wiggle and pull until a few stitches come undone.  Press one side up and the other side down.  It makes the intersection of all those seams less bulky and makes a cute pinwheel on the back too.

When you sew your large white blocks to the pinwheels, press to the white.


I think that is all I have to add.  If you have any questions, please leave a comment and I will answer them here.  Here is another block in different colors that I made last night for my Stars and Pinwheels quilt.

Are you ready to do it?!?  


Thursday, July 14, 2011

You Rock!

When I threw out the Bonus Block Challenge I honestly didn't think anyone would do it - Hello?  An extra block during a busy summer?!?  But look at all the beautiful blocks that have been posted in our flickr group.  Amazing!  We need a Quilters' Got Talent Show!  Here is a sampling of the Bonus Block #1 (I think we will have to do this again).

1. SBS Challenge Block, 2. Design Block, 3. DIY Sawtooth, 4. Challenge- Block #4, 5. Bonus Block, 6. IMG_3147, 7. Gina's experiment with triangles., 8. SBS #4 - Challenge Block, 9. Block Challenge, 10. Quilt Block bonus, 11. P1180474, 12. Skill Builder - Bonus Block, 13. block 4 - design your own, 14. WCDI month 1 bonus block, 15. Skill Builder Challenge block 1, 16. bonus block - SBS Challenge block

There is still time to be entered in the giveaway for finishing all three blocks.  You get an extra entry for making a bonus block.  If you leave a "I finished" comment in the Quilt Math post it doesn't count.  It needs to be in the Giveaway post.  I don't think I am going to get around to picking a winner until tomorrow morning, so you still have a few more hours to finish your blocks!

Tuesday, July 12, 2011

More Star Blocks

I think I have made almost enough 8 inch Civil War blocks for my quilt, now I need to make about ten 12 inch blocks to go with them.  Here are two I made this week.

 This is a flying geese variation inspired (totally copied) from this block.  Please ignore the waves where I tried to ease in too much fabric.  :)  I love these fabrics together.

I first saw this churn dash star here and then when I saw em1097's block I knew for sure I had to make one.  I was planning to use solid brown between the star points but cut out the brown and orange flowers by mistake.  Instead of cutting more fabric, I figured it would be ok.  Surely there would still be enough contrast.  And there is...kinda...  Note to self:  if you don't think the fabrics will work - Cut New Ones!  I still really like it.   I have to find another block to use the butterflies in.  I think they are to die for.

I have been surfing flickr and the Quilter's Cache trying to find more 12 inch star and pinwheel blocks that I like.  Then today I just realized that lots of the blocks in the Summer Sampler Series (another quilt along) were star and pinwheel inspired.  So I think I will be quilting along with them.  I already have a Virginia Star made up in these colors, so I will wait until next week to see what block comes next.

150px Summer Sampler Series Badge

Friday, July 8, 2011

Quilt Math and Drafting Part 1 - squares, rectangles and half square triangles


There is no new block this week, but we are going to talk about "quilt math" and designing your own blocks.  (Sad about no new block?  Don't worry, I have a special block challenge at the end of this post, keep on reading.  :) )

First, some definitions.  A finished block, square or HST is one that is sewn onto other fabric on all four sides.  It is the size you want the piece to be when your quilt is finished.  Unfinished measurements include enough extra fabric for seam allowances.  So our blocks are 12.5 inches square unfinished and 12 inches finished.

Why did I choose for our blocks to finish at 12 inches?  First of all, the bigger the block, the easier it is to sew.  Since we are working with new techniques I figured we could give ourselves a break.  :)  But almost more importantly a 12 inch block is very versatile.

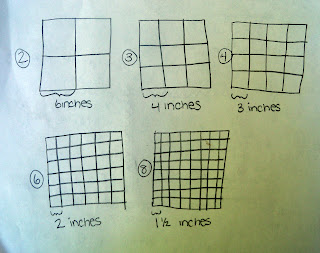
 It can be divided in 2, 3, 4, 6 and 8 evenly.  This allows for a number of different blocks without working with weird fractions.


Let's say I wanted to design my own block and I want to have the block divided into 4 columns and rows.  12 divided by 4 is 3, so each square in my block has a finished size of 3x3 inches.  I start sketching and divide the middle 4 squares on the diagonal and make a pinwheel design.  


But it needs something more so I color in some squares radiating off from the pinwheel.  Looks good!  But I notice that the two white blocks on the sides could be combined.  No point sewing two pieces of fabric together when you can just cut one, so I sketch the block again leaving out the lines that divided the two squares.


Here are the different pieces that I will need.

Now I need to figure out how large to cut my pieces.  I know that each finished square is 3x3, the finished rectangles are 3x6 and the finished HST measure 3x3.


I will need to have a 1/4 inch on each side of the square and rectangle for the seam allowance.  The finished height of the square + 1/4 inch on top + 1/4 inch on bottom =  finished height + 1/2 inch.  

The same holds for the width of the square and rectangle.  Finished width +1/4 on the right +1/4 on the left = finished width +1/2.

The rule is to add 1/2 inch to the finished length and width of squares and rectangles in order to find the unfinished size that you need to cut out.  So I would need to cut my square 3 1/2 x 3 1/2 inches and my rectangle 3 1/2 x 6 1/2 inches


Squares and Rectangles - add 1/2 inch to length and width


A HST unit is made out of two right triangles.  Each triangle needs it's own seam allowance.


They need a 1/4 inch on the side with the 90 degree angle and a 1/4 inch seam at the point, but the point extends farther as it tappers down to a point from the necessary 1/4 inch.  That extra length is 3/8 inch.  Please, let's not go deeper into the geometry of it and just trust that it is so.  :)  I add 1/4 + 1/4 + 3/8 = 7/8.  

I will need to cut squares 7/8 inch larger than the finished HSTs.  In this case the squares I would use to make my HSTs would be 3 7/8 x3 7/8.  If I planned to trim my HSTs to size I would cut my squares slightly larger, 4x4 inches.


Half Square Triangles - add 7/8 inch to the length and width of the squares you use to make them 
(add 1 inch if you plan to trim to size) 

Clear as mud? 

To finish my block I would count up how many different shapes I needed.

4 light 3 1/2 x 6 1/2 inch rectangles
4 medium 3 1/2 x 3 1/2 inch squares
2 dark 3 7/8 x 3 7/8 inch squares
2 light 3 7/8 x 3 7/8 inch squares (or 4x4)

I would make my HSTs, attach them to the medium squares, sew the rectangles onto the sides and then join the four subsections into a whole block.  And voila!  My block would be done.

I know there is way too much math and way too few pretty pictures in this post.  :)  Please, if you have any questions let me know.

I have an optional challenge for you this week:  design and make your own 12 inch finished block!

Sketch a large square and divide it into 4 sections length and width wise, just like I did.  Now start sketching.  You can use squares, triangles and rectangles.  Here is a series of 4x4 blocks that I did to come up with ideas for a bee block.  It doesn't have to be pretty!  :)

Really, the possibilities are endless.


Feeling up to the challenge?  You Can Do It!  I would love to see what you make!  (Flickr group here.)
Be sure to leave a comment on the next post to be entered in the "I've Made All 3 Blocks!" giveaway.